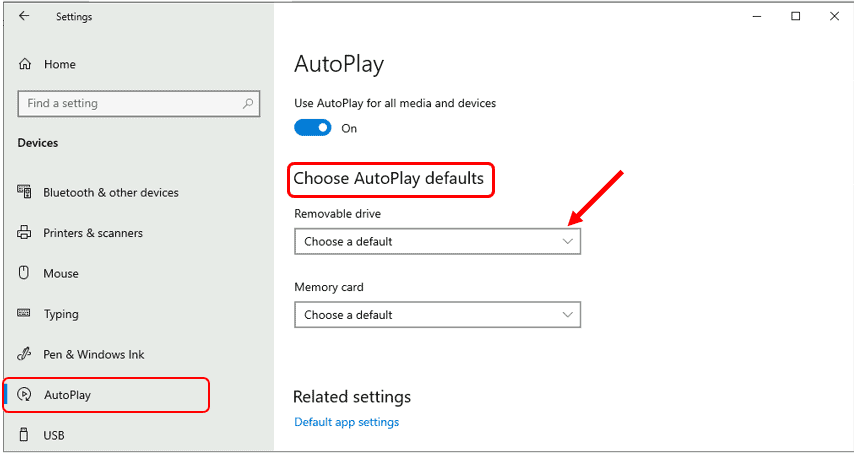
To enable or disable AutoPlay in Windows 10, follow these steps:
- Open the “Settings” app by pressing the Windows key + I.
- Navigate to “Devices.”
- In the left pane, click on “AutoPlay.”
- Here, you can enable or disable AutoPlay for different types of media. For example, you can choose to automatically open photos and videos when you connect a camera or phone, or to open music files when you connect a portable music player.
To disable AutoPlay for a specific device type, follow these steps:
- In the “AutoPlay” settings, find the device type you want to disable AutoPlay for. For example, if you want to disable AutoPlay for portable music players, look for “Media player (MP3, WMA, WAV).”
- Click on the dropdown menu next to the device type.
- Select “Take no action” from the list of options.
To disable AutoPlay for all device types, follow these steps:
- In the “AutoPlay” settings, ensure to click on “Change default settings.”
- In the “Default action” dropdown menu, select “Take no action.”
- Click “Save” to save your changes.
Please note that disabling AutoPlay may prevent certain actions from occurring automatically when you connect specific devices. If you want to enable AutoPlay for a specific device type after disabling it, simply change the “Take no action” option back to the desired default action in the “AutoPlay” settings.
If you want to disable AutoPlay for all devices, you can do so by following the steps to disable AutoPlay for all device types. However, this may not be recommended, as it will prevent any automatic actions from occurring when you connect any device.
To re-enable AutoPlay for a specific device type, simply change the “Take no action” option back to the desired default action in the “AutoPlay” settings.
Note:
The steps provided above are for Windows 10. There is a chance that the steps will differ slightly if you are using an older version of Windows.
About Author
Discover more from SURFCLOUD TECHNOLOGY
Subscribe to get the latest posts sent to your email.