Open Adobe Photoshop and create a new file: Start by opening the Adobe Photoshop application.
- Go to File
- New, and create a new file with your desired dimensions.
Set up the workspace
Adjust the workspace by clicking on the Window button in the top menu, and select Zoom. Choose the percentage that you prefer, such as 50% or 100%.
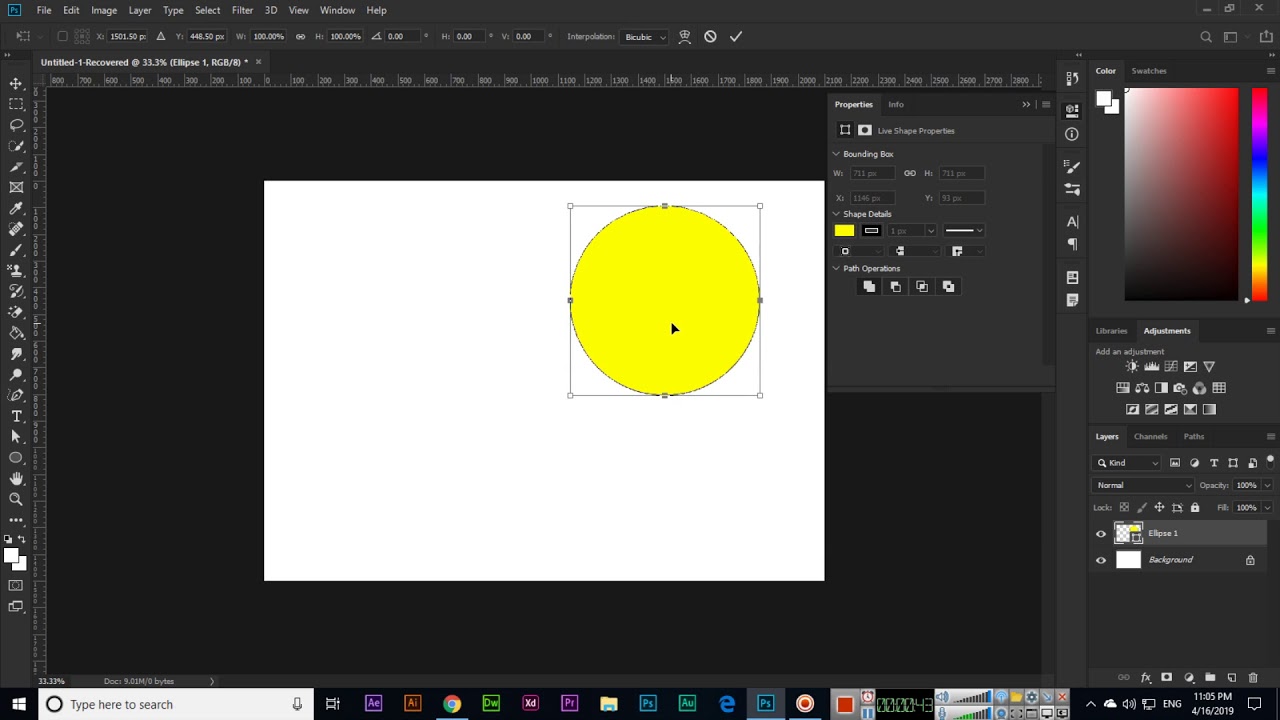
Select the ellipse tool
To draw an oval, you need to select the Ellipse Select tool from the toolbox on the left side of the screen. However, and optionally, you can also make use of the keyboard shortcut V.
Draw the oval
Click on the center of the desired oval, and drag to form the shape. To create an oval, hold down the Shift key while dragging. This will maintain the proportions of a circle as you resize the shape.
Add a background
You can also use the bucket tool or the pen tool to add a background color to your oval. Select the background color from the color picker on the right side of the screen, and then use the bucket tool or pen tool to fill in the oval.
Save your work
Once you have finished drawing the oval, you can save your work by going to File > Save As, and choose a location to save your file.
Print or export your work
If you want to print your oval,
- File
- Alternatively, you can export your oval as a different file format by going to:
- File > Export.
Remember, practice is key. The more you draw and experiment with different techniques, the better your skills will become.
About Author
Discover more from SURFCLOUD TECHNOLOGY
Subscribe to get the latest posts sent to your email.