A bootable disk, often referred to as a boot disk or a startup drive, is normally a storage device or disk that can be used to boot a computer. It contains a program known as the bootloader, which is responsible for loading the operating system (OS) from the disk. The operating system can be one of the following: Win2000, Windows Vista, XP, Mint, Fedora, Ubuntu, and others.
Use Disk Utility: If you have a macOS system, you can use the built-in Disk Utility application to create a bootable DOS disk.
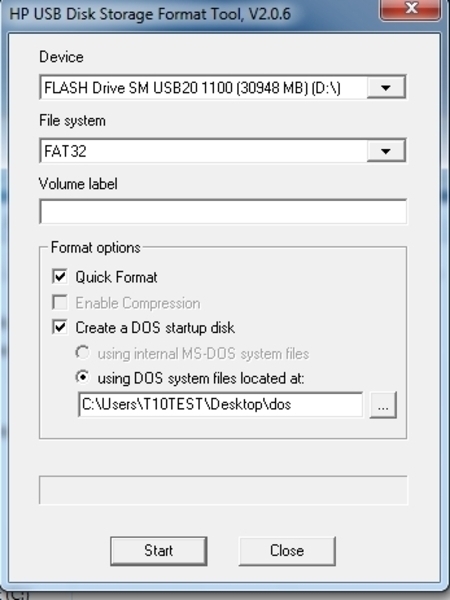
Insert a USB flash drive: You need a USB flash drive that is at least 512MB. This drive will be formatted, and all data on it will be deleted.
Open Disk Utility: Click on the “Go” menu at the top of the screen and select “Utilities.” In the Utilities folder, open the “Disk Utility” application.
Select the USB flash drive. In the sidebar of the Disk Utility window, you will see a list of drives. Find your USB flash drive, which is usually labelled as “External” or “Removable Media.”
Erase the USB flash drive: Select the USB flash drive, then click the “Erase” button at the top of the window. Set the format to “Master Boot Record (MBR)” and the scheme to “GUID Partition Table.” Finally, click the “Erase” button.
Download the DOS disk image: Visit the Microsoft website to download a bootable DOS disk image. These images are usually small and designed to fit on a CD.
Burn the DOS disk image to the USB flash drive: After the download is complete, locate the downloaded DOS disk image file. This file is usually named something like “DOS.iso” or “DOS.img.”
Select “Disk Utility” from the “Go” menu in the window given, then select the USB flash drive.
Click the “Restore” button at the top of the window as displayed.
Navigate to the downloaded DOS disk image file and select it.
Click the “Restore” button. This process may take several minutes, as the image is being burned to the USB flash drive.
Once the process is complete, your USB flash drive is now bootable with DOS.
Always remember to back up any important data before proceeding with these steps, as they will result in the deletion of all data on the selected USB flash drive.
About Author
Discover more from SURFCLOUD TECHNOLOGY
Subscribe to get the latest posts sent to your email.