A printer in IT or computing is known to be one of the best output devices that helps and enables users to print out the hard copy of a file or a document.
Steps installing a network printer
1. Click on the start button on the taskbar
2. Move the mouse pointer to settings and click on it
3. Move to the device column and click on devices
4. Click on printers and scanners
5. Click on the add button that is add printer & scanner
6. Wait for Windows to search and locate the available printers in the system
7. However, if your printer is detected, next step is to click on it
8. Follow the prompt to install it
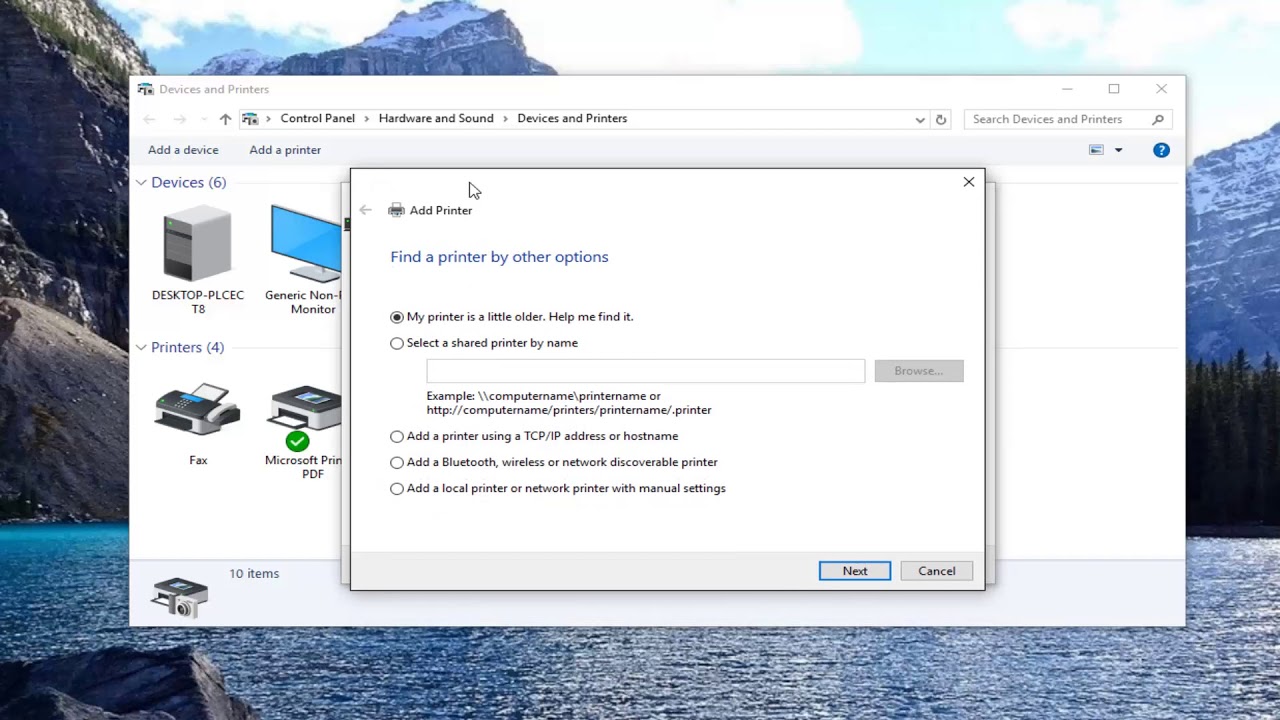
9. In case the printer is not detected, ensure to click on “The printer that I want isn’t listed” at the bottom of the window.
10. You must select “Add a local printer or network printer” with the manual settings that follow
11. Choose the right port number that your printer or network printer is connected to and with
12. Make sure to select the manufacturer and model name or number of your printer from the given list.
13. You may also need to download updated drivers if the need arises.
14. Follow the online screen guide and finish the installation.
About Author
Discover more from SURFCLOUD TECHNOLOGY
Subscribe to get the latest posts sent to your email.