Changing a personal resolution in Windows 10 is known as a simple instruction and a straightforward process and procedure. below are the steps and guides to follow:
Changing the Display Resolution
-
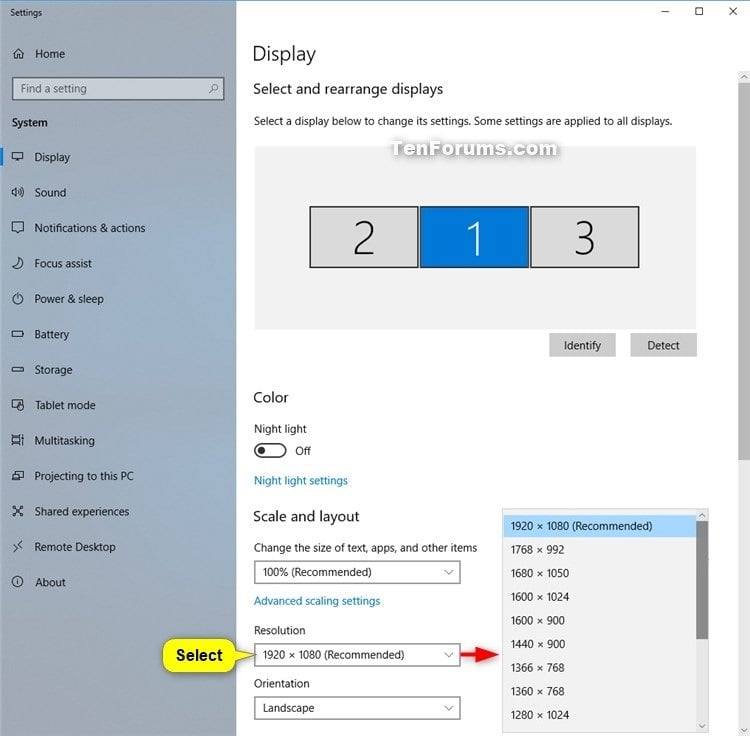
Right-click on the desktop, that is anywhere that is free, not specifically on any icons or a folder. -
Select and click on the display settings from the given shortcut menu -
Scroll down to display resolution and click on it. -
Make an option by clicking on the different types of kinds of resolutions from the drop-down menu -
Apply the changes made -
Ensure to click on confirming the changes made and or click on the OK button.
NOTE:
A user can apply a custom resolution if needed and per the user’s decision.
How to remove a resolution
There is no direct way of removing the said resolutions, instead, it a vice versa of the aforementioned steps practically.
In addition, a resolution can be changed or set to none or:
-
Opening the graphics control panel -
Find the custom resolution feature -
Delete the custom resolution -
Confirm the changes made
About Author
Discover more from SURFCLOUD TECHNOLOGY
Subscribe to get the latest posts sent to your email.