Adding a printer to Windows can be a very simple task to perform. Printers are noted to be one of the most important output devices that help users get the hard copy of whatever is inputted into the system.
How to add a Printer in Ms Windows 10
- Make sure all the cables, including the power and the data cables, are set for installation of the printer
- Connect your printer to the power outlet
- Make sure the printer is powered on
- Use the installation CD to install the drivers and other related firmware or files.
- Locate the setup files for the printer
- Double click on it
- Follow the on-screen instruction and wait till the installations is done
- Click on Finish button when down
- During the installation, the system would ask the user to connect the printer to the computer system
- Make sure it is done by using the USB cable, that is from the printer USB port to the system unit USB port
- A test page would be sent to the printer right after the installation is done.
- Click on ok or print to print the test page and other alignments
Alternatively
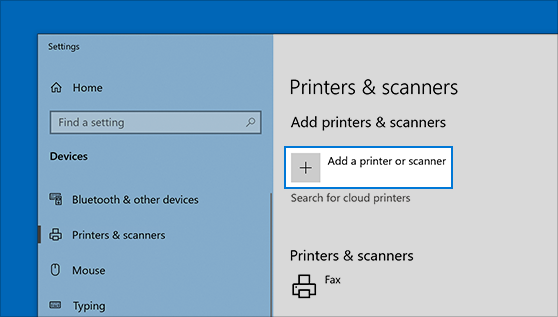
- You can go to the computers settings by going to start button and selecting settings.
- Ensure to move to the devices components category
- Move to Printers and Scanners
- Make sure to click on add printer or any other devices, such as scanner and many more
- At this point, the user has to wait for Windows to find nearby devices, such as printers.
- Make sure to select or choose the one you want to add
- Click on add device button.
About Author
Discover more from SURFCLOUD TECHNOLOGY
Subscribe to get the latest posts sent to your email.